How to create Asset in Aranet Cloud?

aranet-techsupport
Posted: 10.06.2021 16:44
Modified: 26.07.2024 19:01
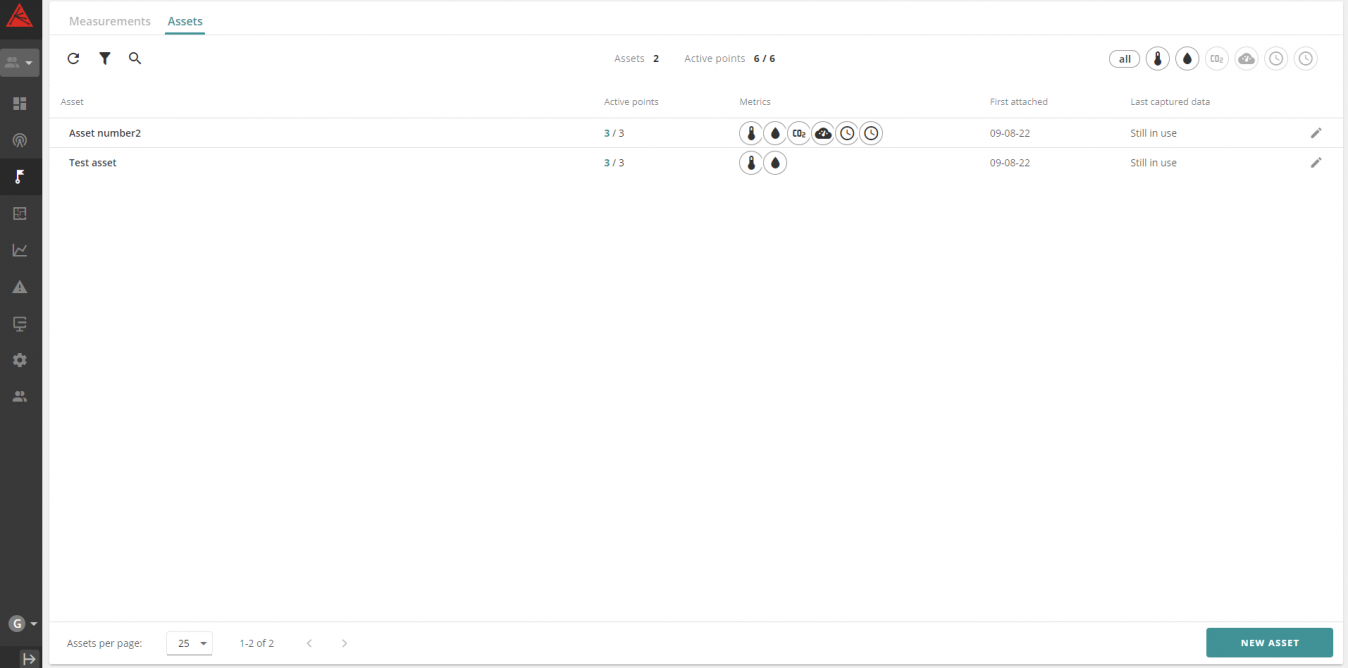
Login to your Aranet Cloud organization as Administrator and navigate to ASSETS menu.
Switch to ASSETS tab and click to NEW ASSET button:
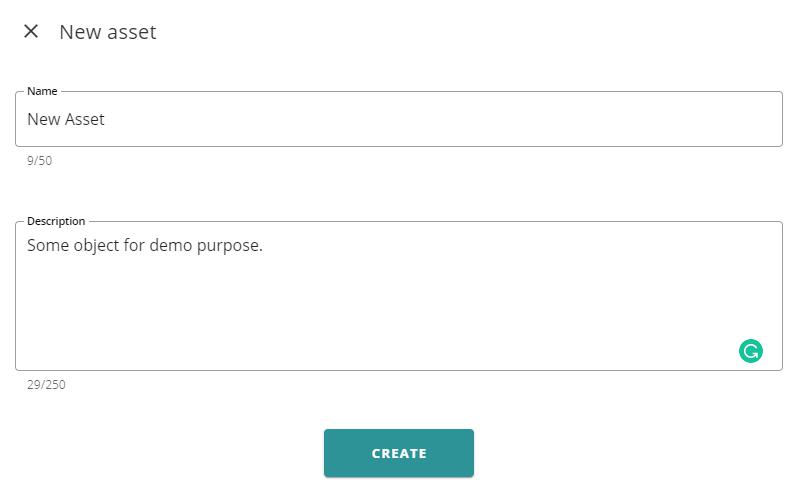
Give Asset a name and description and click on CREATE button:
Pop-up window will open. On the left, there is a list of all sensors (physical and virtual) available in your Organization. On the right, there is a timeline with the current date and time marked.
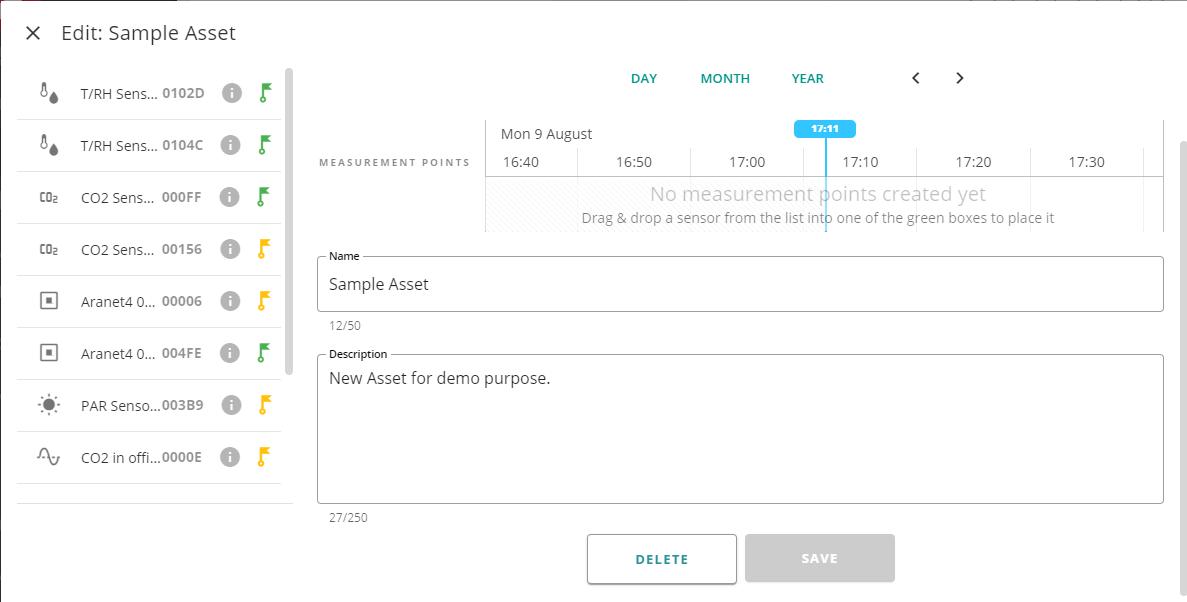
Sensors available for attaching to the Asset are marked with green flag icon
 . Sensors already attached to the Assets are marked with yellow flag icon
  . To attach the sensor to asset, drag and drop it to the timeline:
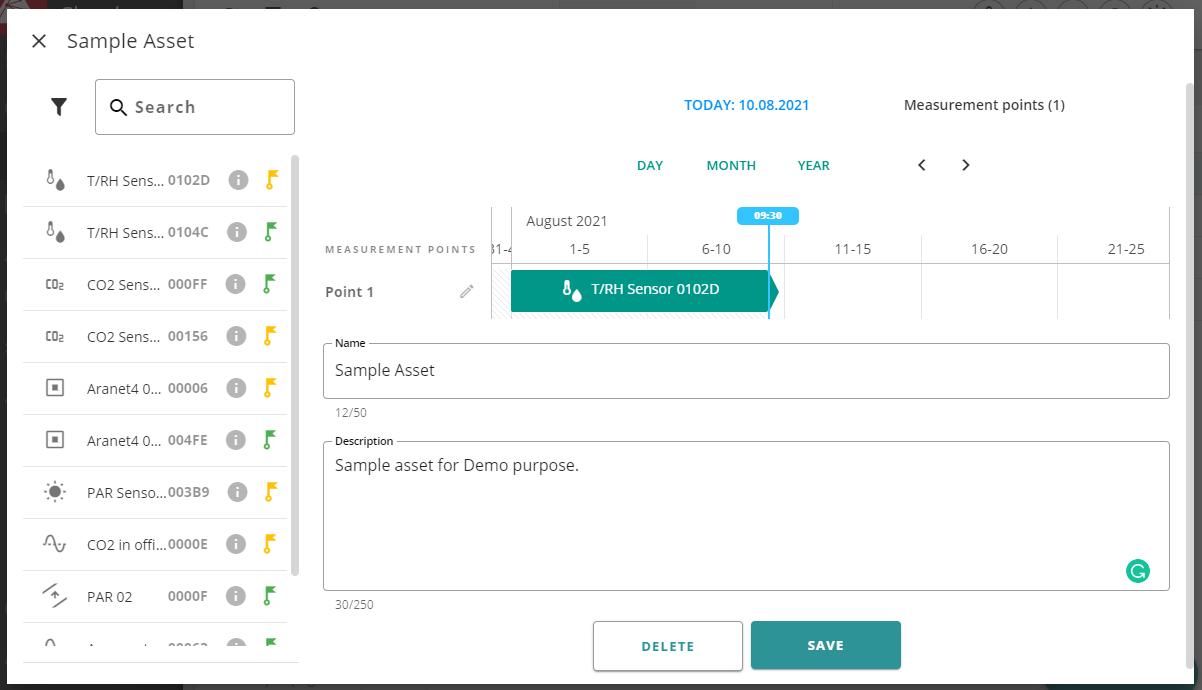
Now you can edit measurement point by clicking on pencil icon
 . You can change its name and select metrics needed. When all is done, click SAVE button:
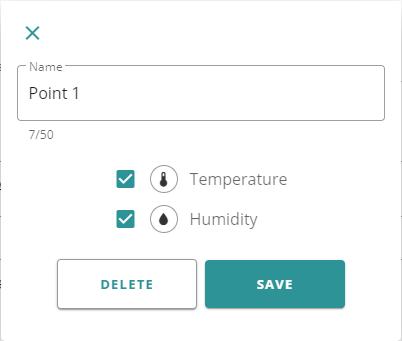
If you click on the sensors ribbon on the timeline, pencil icon
 will appear. This aloows you to edit sensors link to timeline:
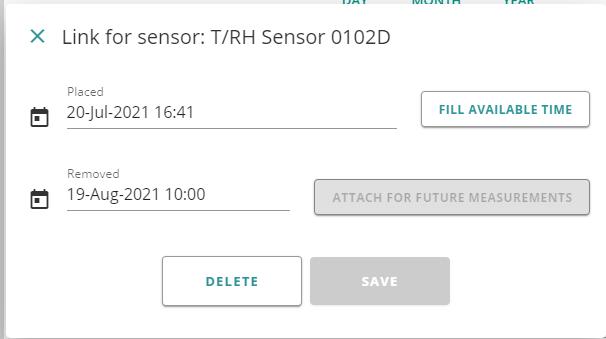
You can set sensors Placement and Removement (if needed) date and time. By default, sensor is placed without Remove time. Pressing on FILL AVAILABLE TIME button will extend sensors link from the date of the earliest sensors measurement time available in Cloud as Placement, and till the next another sensors placement time to the same measurement point (if this was planned and placed before).When you finish with sensors link editing, you can continue with other sensors adding to the asset. Click SAVE button to finish the asset creation process.
You have to log in to reply.